## Dry Erase Holder
**Created by**: Hello Robot Inc
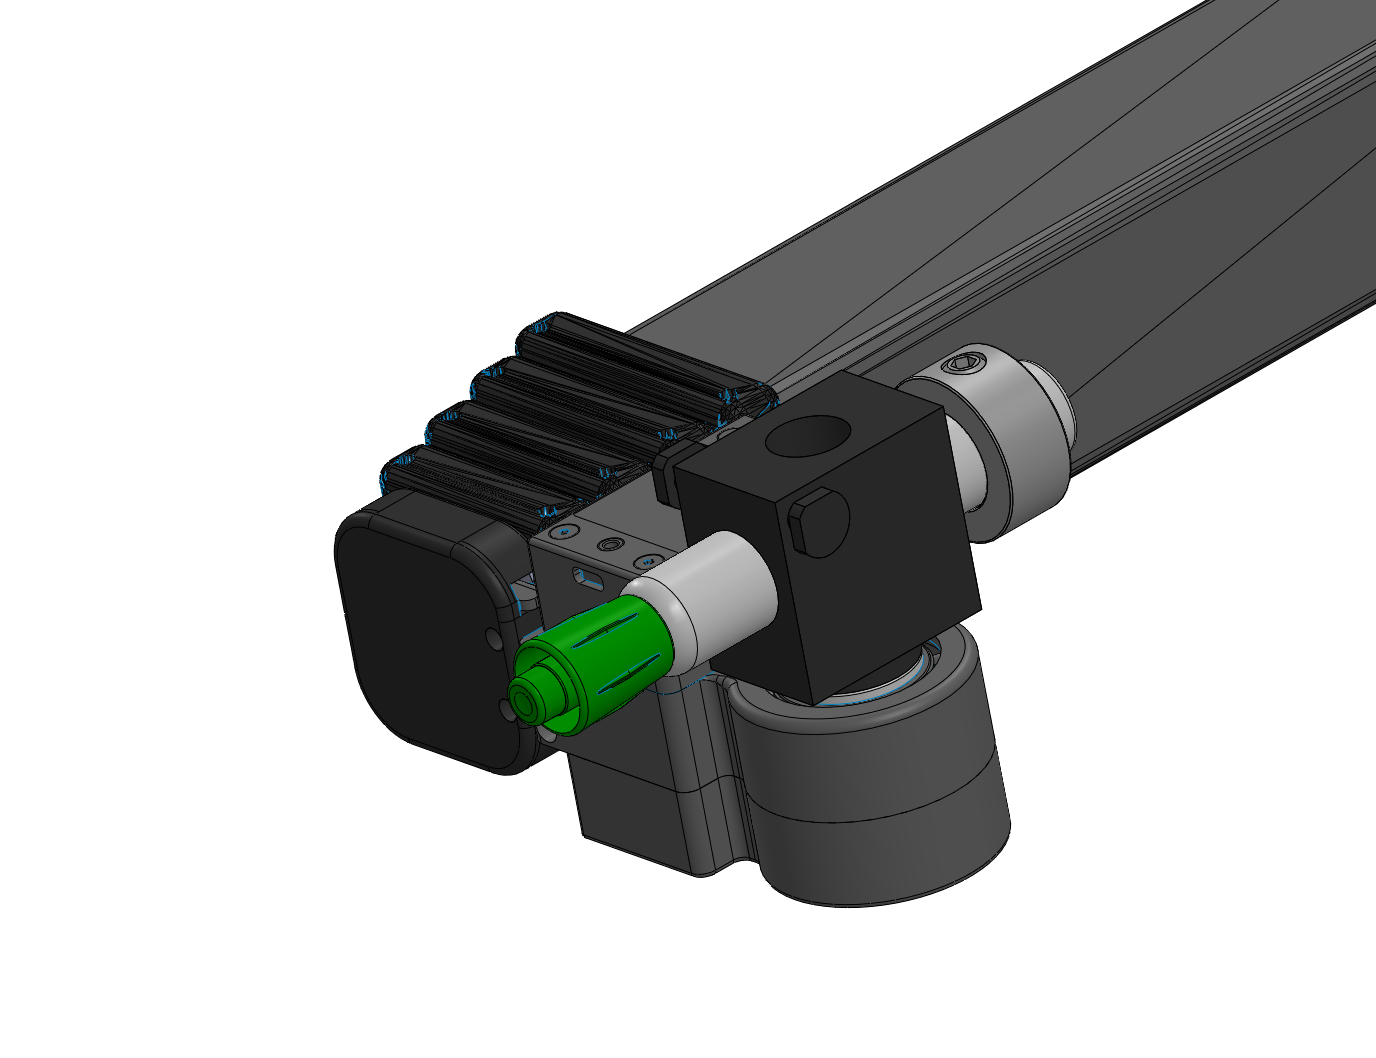
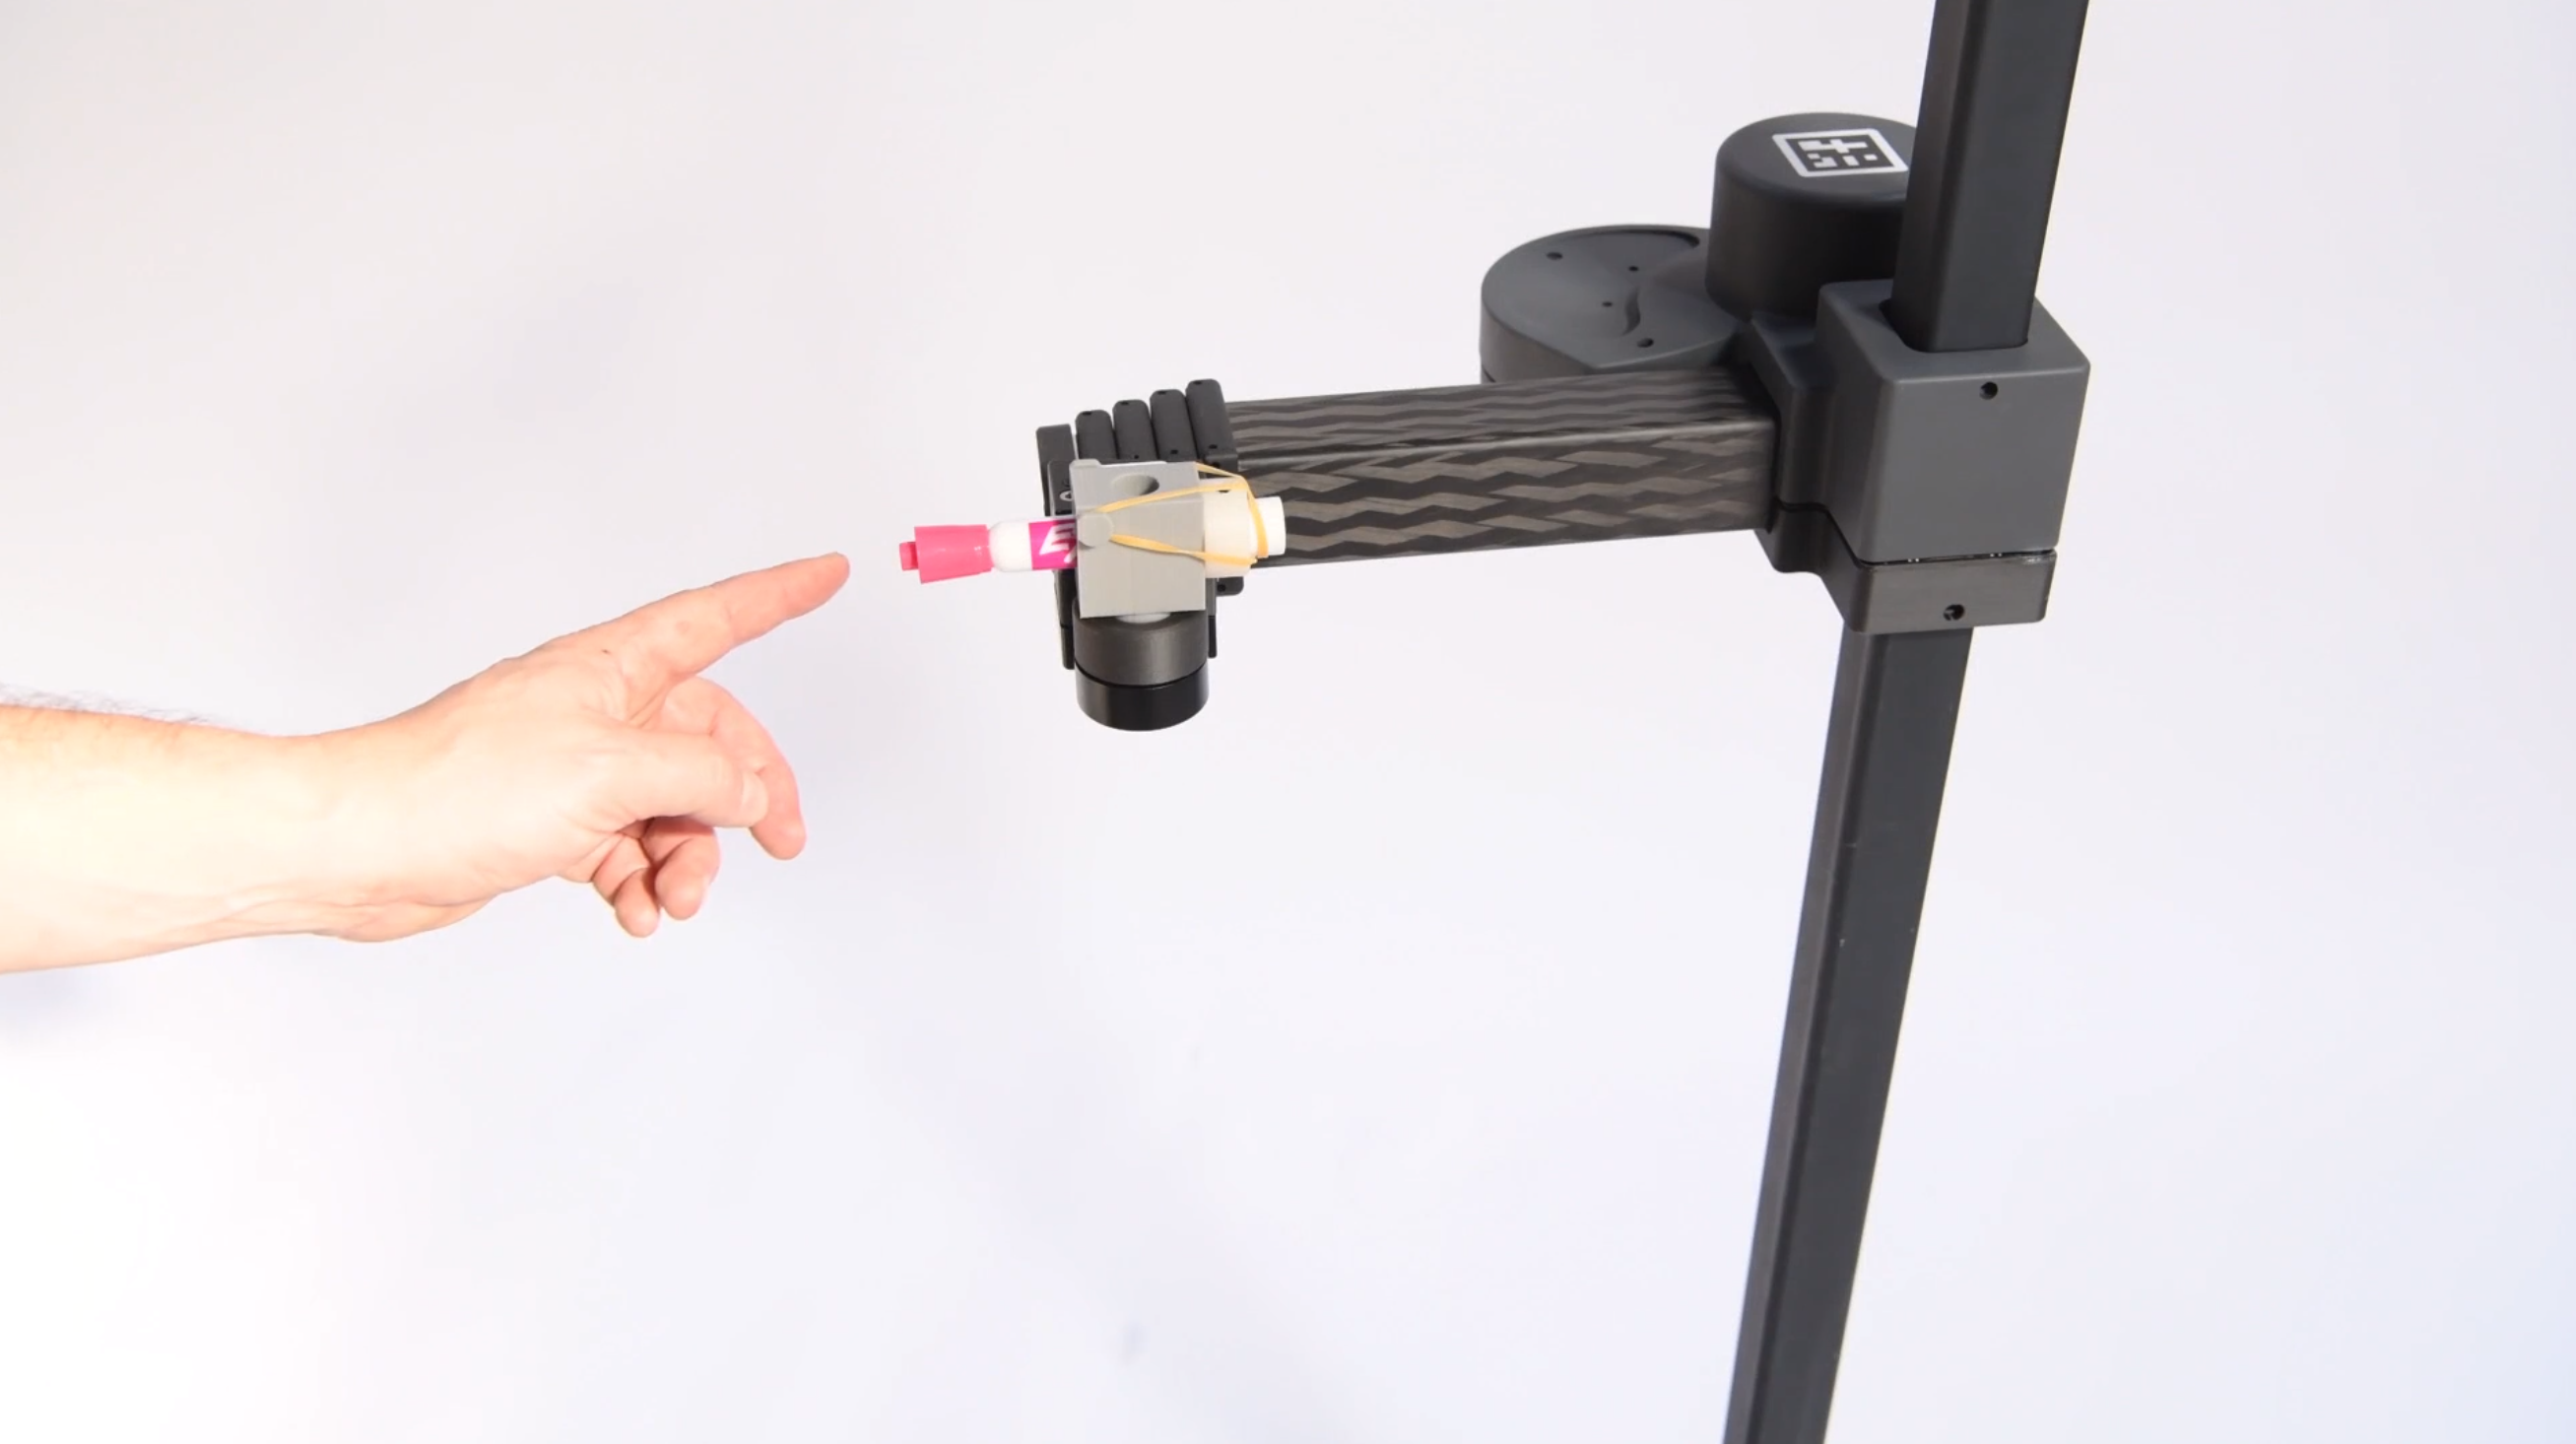
This tool allows Stretch to hold a dry-erase marker. It is spring-loaded, allowing for compliant interaction between the marker and a whiteboard.
The tool can be integrated into your robot URDF by integrating its [stretch_description](https://github.com/hello-robot/stretch_tool_share/tree/master/tool_share/dry_erase_holder_V1/stretch_description) as described in the [Stretch ROS documentation](https://github.com/hello-robot/stretch_ros/tree/master/stretch_description).

 ## Parts List
| Item | Qty | Vendor |
| ------------- |:-------------:| -----: |
| [Expo Dry Erase](https://www.amazon.com/gp/product/B00006IFIL/ref=ppx_yo_dt_b_asin_title_o04_s00?ie=UTF8&psc=1) | 1 | Amazon |
| [M5x50mm Hex Head Bolt](https://www.mcmaster.com/91287A333) | 1 | McMaster-Carr |
| [M5 Nut](https://www.mcmaster.com/90591A260) | 2 | McMaster-Carr|
| [wrist_end_cap_5mm](https://github.com/hello-robot/stretch_tool_share/blob/master/tool_share/dry_erase_holder_V1/CAD/wrist_end_cap_5mm.STL) | 1 | PLA 3D Printer |
| [dry_erase_bushing_block](https://github.com/hello-robot/stretch_tool_share/blob/master/tool_share/dry_erase_holder_V1/CAD/dry_erase_bushing_block.STL) | 1 | PLA 3D Printer |
| [Size 30 Rubber Band](https://www.mcmaster.com/12205t76) | 2 | McMaster-Carr |
| [3/4" Shaft Collar](https://www.mcmaster.com/60475k74) | 1 | McMaster-Carr |
## Assembly instructions
[View 3D assembly](https://github.com/hello-robot/stretch_tool_share/blob/master/tool_share/dry_erase_holder_V1/CAD/ASSEM_Dry_Erase_Holder_V1.STL)
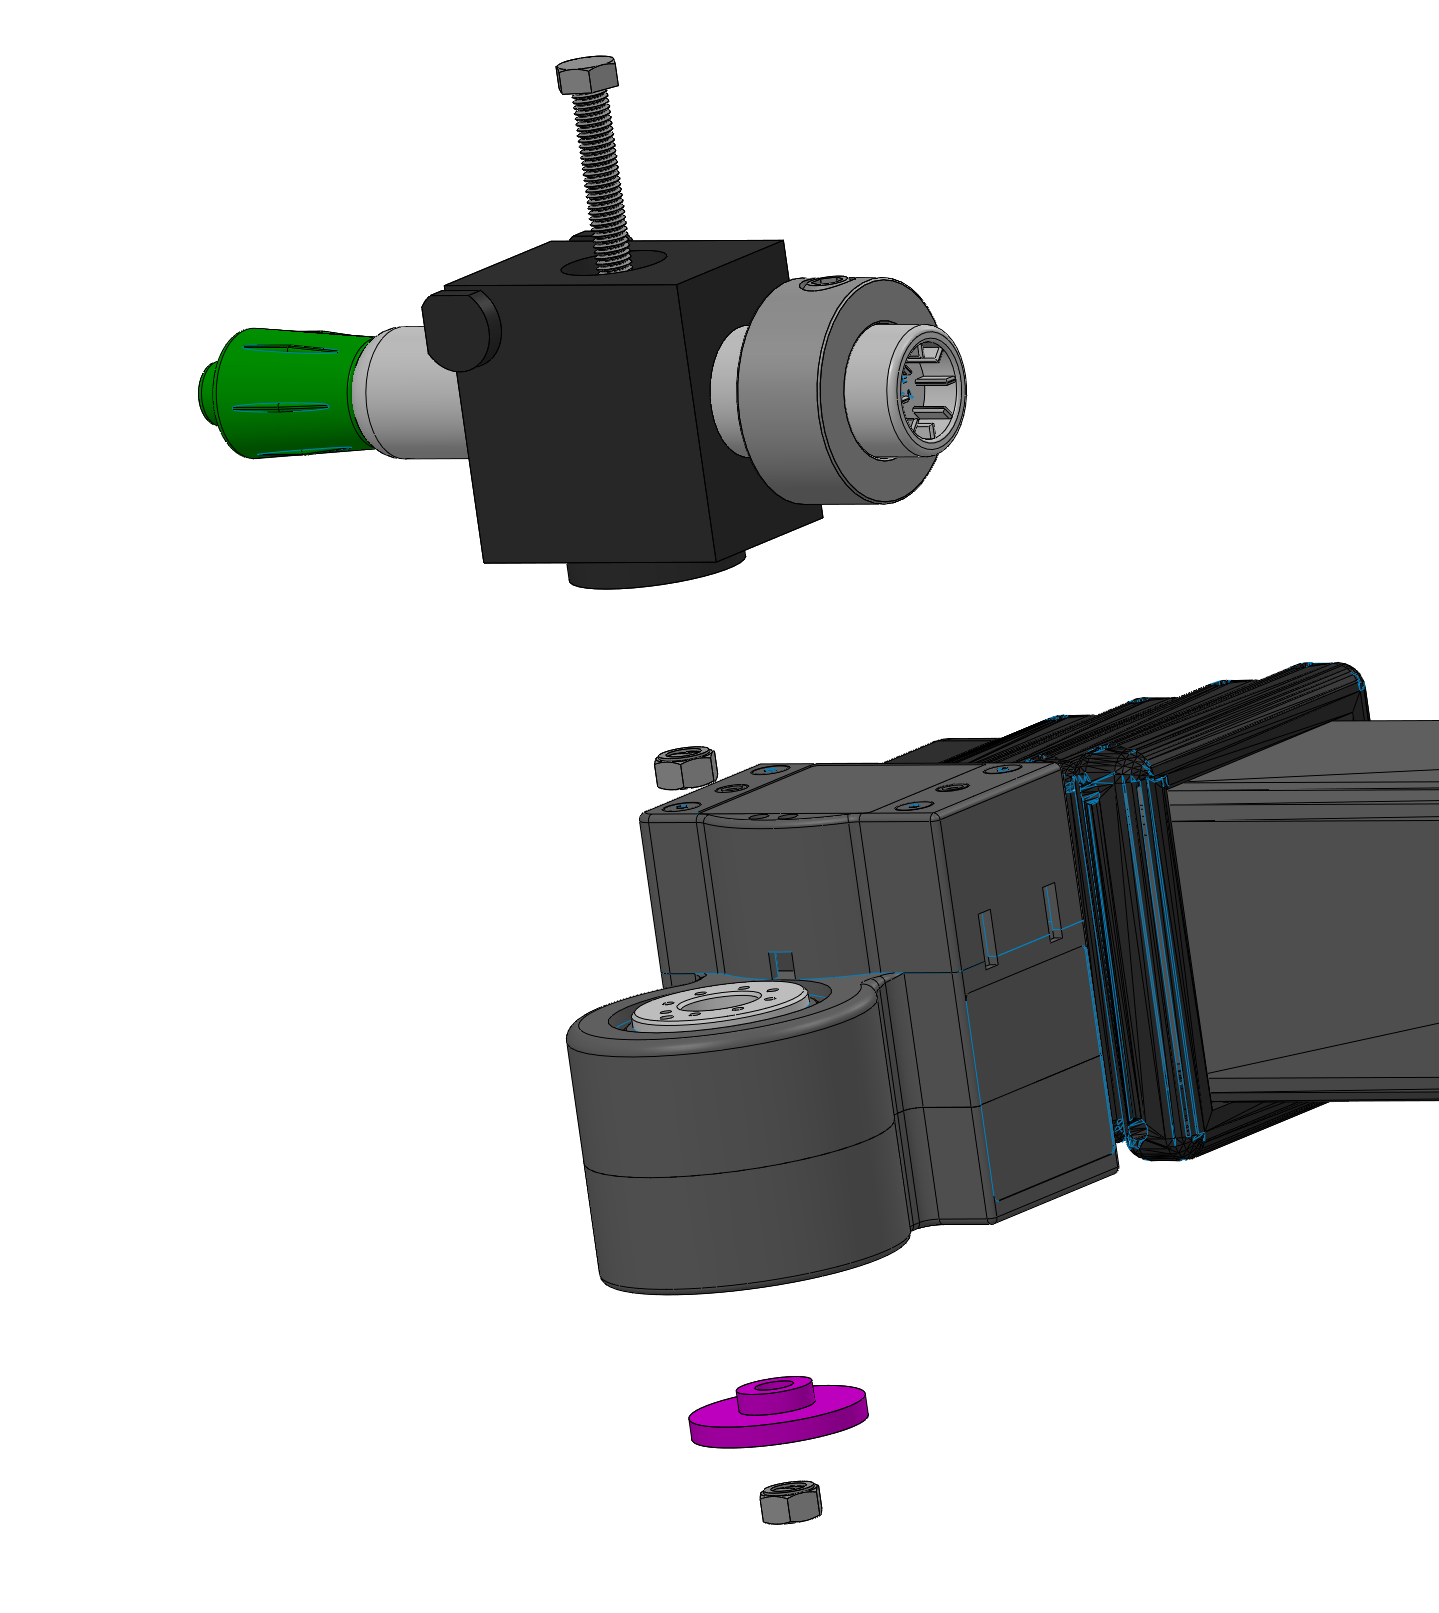
 1. Install the bolt into the dry_erase_bushing block and secure from below with an M5 nut.
2. Attach the dry-erase bushing block to the tool plate, securing from below with the wrist_end_cap_5mm and an M5 nut. Orient the block so the marker points forward.
3. Attach the shaft collar to your dry-erase marker, approximately 8mm from the back of the marker.
4. Slide the marker into the bushing block. Loop a rubber band around the back of the marker and over to one of the pegs on the side of the bushing block. Repeat with the other peg.
5. The marker should now easily spring back when pushed against it. You're ready to write!
 ## Parts List
| Item | Qty | Vendor |
| ------------- |:-------------:| -----: |
| [Expo Dry Erase](https://www.amazon.com/gp/product/B00006IFIL/ref=ppx_yo_dt_b_asin_title_o04_s00?ie=UTF8&psc=1) | 1 | Amazon |
| [M5x50mm Hex Head Bolt](https://www.mcmaster.com/91287A333) | 1 | McMaster-Carr |
| [M5 Nut](https://www.mcmaster.com/90591A260) | 2 | McMaster-Carr|
| [wrist_end_cap_5mm](https://github.com/hello-robot/stretch_tool_share/blob/master/tool_share/dry_erase_holder_V1/CAD/wrist_end_cap_5mm.STL) | 1 | PLA 3D Printer |
| [dry_erase_bushing_block](https://github.com/hello-robot/stretch_tool_share/blob/master/tool_share/dry_erase_holder_V1/CAD/dry_erase_bushing_block.STL) | 1 | PLA 3D Printer |
| [Size 30 Rubber Band](https://www.mcmaster.com/12205t76) | 2 | McMaster-Carr |
| [3/4" Shaft Collar](https://www.mcmaster.com/60475k74) | 1 | McMaster-Carr |
## Assembly instructions
[View 3D assembly](https://github.com/hello-robot/stretch_tool_share/blob/master/tool_share/dry_erase_holder_V1/CAD/ASSEM_Dry_Erase_Holder_V1.STL)
 1. Install the bolt into the dry_erase_bushing block and secure from below with an M5 nut.
2. Attach the dry-erase bushing block to the tool plate, securing from below with the wrist_end_cap_5mm and an M5 nut. Orient the block so the marker points forward.
3. Attach the shaft collar to your dry-erase marker, approximately 8mm from the back of the marker.
4. Slide the marker into the bushing block. Loop a rubber band around the back of the marker and over to one of the pegs on the side of the bushing block. Repeat with the other peg.
5. The marker should now easily spring back when pushed against it. You're ready to write!