|
|
- # Dex to Standard Wrist
- This tutorial will guide you through the steps of replacing a gripper with a Dex Wrist (3-DoF) for one with a Standard Wrist (1-DoF).
-
- ## Parts and Tools Required
- Please note that this procedure does not require any additional parts or tools apart from the ones that were shipped with the robot:
-
- - 8 [M2x6mm Torx FHCS bolts](https://www.mcmaster.com/90236A104/)
- - 4 [M2.5x4mm Torx FHCS bolts](https://www.mcmaster.com/92703A448/)
- - 2 [M2.5x8mm SHCS bolts](https://www.mcmaster.com/91290A102/)
- - T6 Torx wrench
- - T8 Torx wrench
- - 2mm Hex key
-
- ## Removing Dex Wrist Gripper
- Here we describe removing the Dex Wrist gripper. Please ensure that the robot is turned off before proceeding.
-
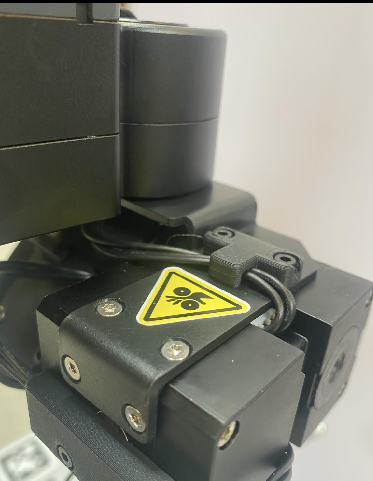
- First, inspect the parts and ensure that you have everything you need for the procedure.
-
- 
-
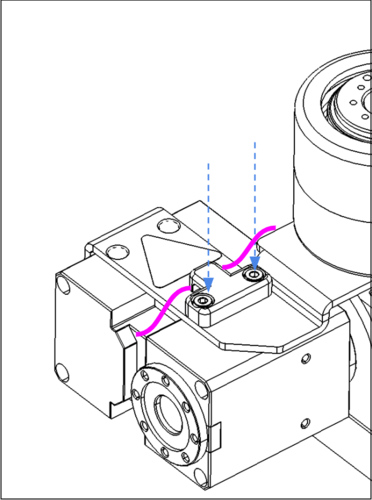
- Now, remove the cable clip by unscrewing the M2.5x8mm bolts and then unplug the Dynamixel cable out of the wrist pitch servo (pink).
-
- 
-
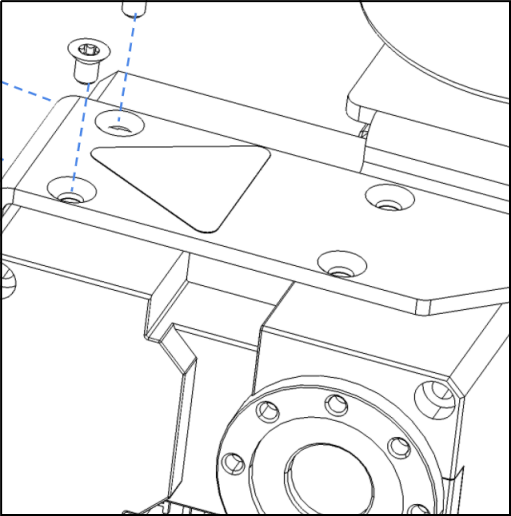
- Next, rotate the wrist yaw joint so that the wrist pitch servo body is accessible. Detach the pitch servo from the mounting bracket by unscrewing the four M2.5x4mm screws (C) with the T8 Torx wrench.
-
- 
-
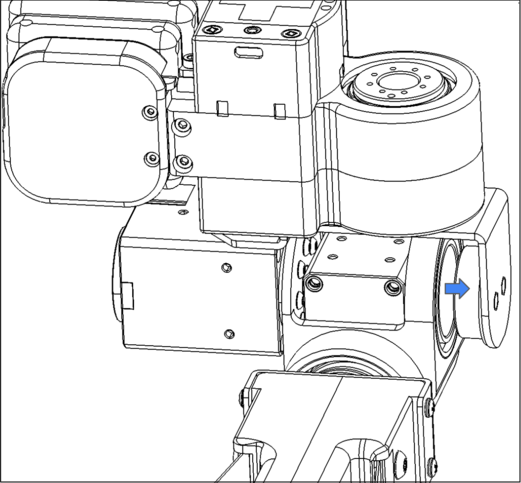
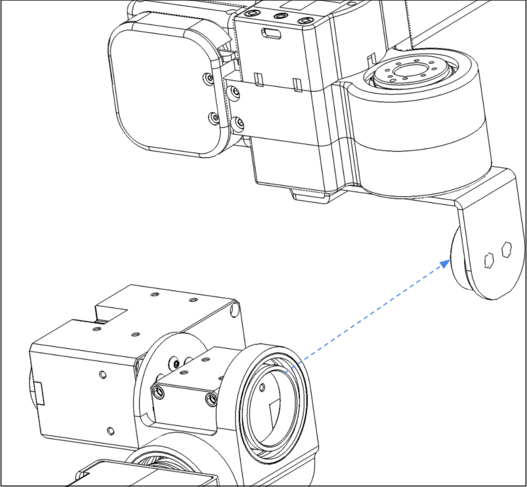
- Slide the wrist module out horizontally so that the bearing unmates from its post.
-
- 
-
- Then, lower the wrist module vertically away from the mounting bracket.
-
- 
-
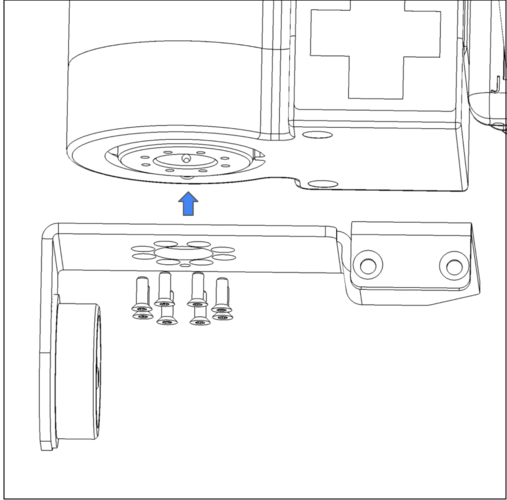
- Lastly, detach the wrist mount bracket (A) from the bottom of the tool plate by removing the M2x6mm bolts (B) using a T6 Torx wrench.
-
- 
-
- ## Attaching Standard Wrist Gripper
- Here we describe attaching the Standard Wrist gripper.
-
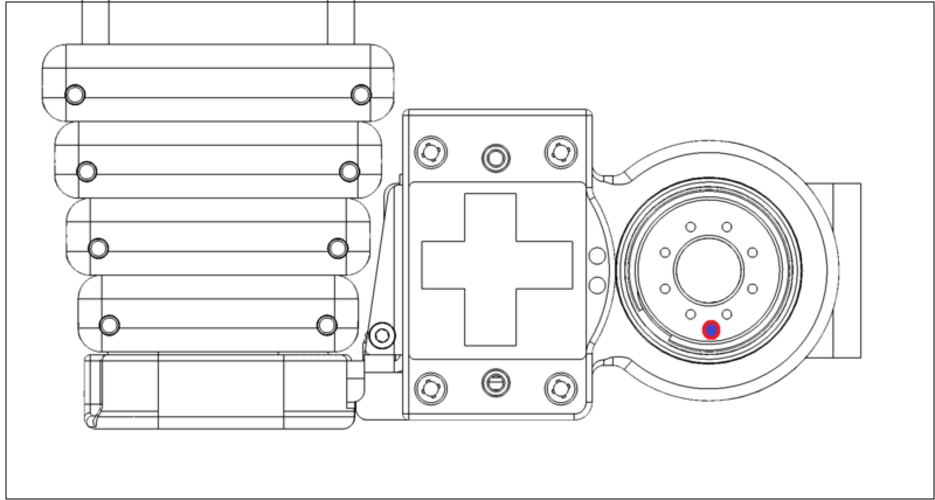
- First, note where the forward direction is on the wrist yaw tool plate. This is indicated by the additional alignment hole that is just outside the bolt pattern shown pointing down in the image.
-
- 
-
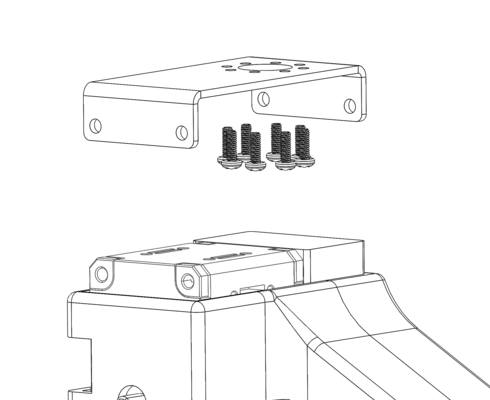
- Then, route the Dynamixel cable through the center of the standard gripper mounting bracket and install the bracket with the eight screws and T6 Torx wrench. Make sure the forward marking on the bracket matches the forward marking on the wrist yaw.
-
- 
-
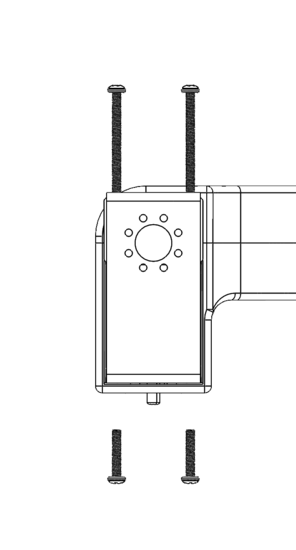
- Now, affix the four screws, with the shorter two going to the servo side, to hold the gripper to the bracket. Lastly, route the Dynamixel cable through the back of the gripper and plug it securely into the servo.
-
- 
-
- ## Software Instructions
- Once the hardware has been replaced, it's time to make the software changes for Stretch to recognize the Standart Wrist gripper. Turn on the robot and follow the instructions below.
-
- To revert the changes in stretch_configuration_params.yaml, first download the [dex_to_standard_configure_params.py script](https://github.com/hello-robot/stretch_tutorials/blob/master/stretch_tool_share/dex_to_standard_configure_params.py) using:
- ```{. bash .shell-prompt}
- cd ~/Desktop
- wget https://raw.githubusercontent.com/hello-robot/stretch_tutorials/master/stretch_tool_share/dex_to_standard_configure_params.py
- ```
-
- Then, change execution permissions and execute it in a terminal as below:
-
- ```{.bash .shell-prompt}
- chmod +x dex_to_standard_configure_params.py
- python3 dex_to_standard_configure_params.py
- ```
-
- Ensure that the changes were written correctly to stretch_params:
- ```{.bash .shell-prompt}
- stretch_params.py | grep robot.tool
- ```
-
- This should return the tool as `tool_stretch_gripper`.
-
- Next, to ensure the correct gripper is recognized by ROS, we need to update the URDF. For this, first open the stretch_description.xacro file like below.
-
- ```{.bash .shell-prompt}
- cd ~/catkin_ws/src/stretch_ros/stretch_description/urdf
- gedit stretch_description.xacro
- ```
-
- Then, replace the contents of the file with that of the default [stretch_description.xacro](https://github.com/hello-robot/stretch_ros/blob/master/stretch_description/urdf/stretch_description.xacro) by copying and pasting the contents from the file in the link to the open file.
-
- Lastly, to generate the updated URDF, execute the following commands in a terminal.
-
- ```{.bash .shell-prompt}
- rosrun stretch_calibration update_urdf_after_xacro_change.sh
- cd ~/catkin_ws/src/stretch_ros/stretch_description/urdf
- ./export_urdf.sh
- ```
-
- You can ensure that the gripper is functional by homing the Dynamixel servos with the following commands:
-
- ```{.bash .shell-prompt}
- stretch_gripper_home.py
- ```
-
- ```{.bash .shell-prompt}
- stretch_wrist_yaw_home.py
- ```
-
- If you encounter any issues, please contact support.
|
